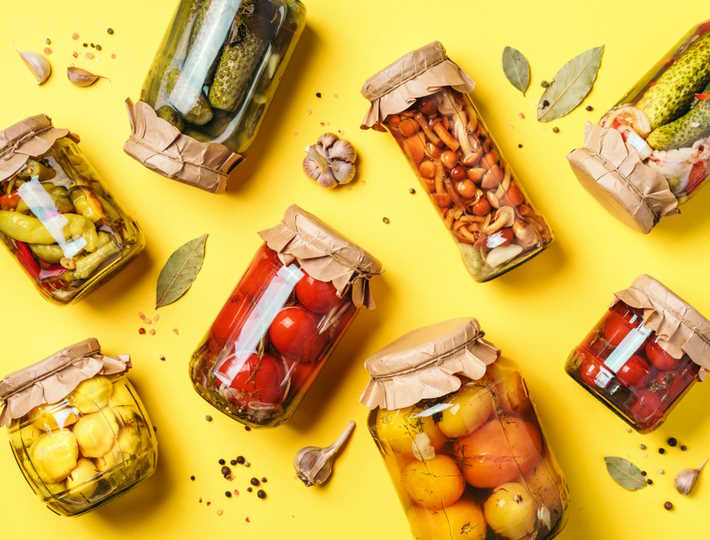
There’s nothing quite like the satisfaction of opening a jar of homemade jam or pickles that you canned yourself. Not only is it a fantastic way to preserve fresh produce, but it’s also a wonderful feeling knowing exactly what ingredients are going into your food. Canning and preserving your own food has been a tradition for centuries, and it’s still just as delightful today as it was in the past.
In addition to knowing the exact ingredients in your food, canning and preserving also allows you to enjoy seasonal fruits and vegetables year-round. Instead of relying on grocery store produce that may have traveled thousands of miles to get to you, you can enjoy the flavors of summer in the middle of winter.
But canning and preserving is more than just practicality and convenience – it’s also fun! It’s an enjoyable activity that can be done alone or with friends and family. The process of transforming fresh ingredients into jars of deliciousness is rewarding in and of itself, and it’s a great way to connect with the food you eat.
Benefits of canning and preserving:
- Know exactly what ingredients are in your food
- Enjoy seasonal fruits and vegetables year-round
- Create a sense of connection to your food
- Save money by buying produce in bulk and preserving it for later
- Reduce food waste by using up excess produce
If you’re new to canning and preserving, don’t worry – it’s easier than you think. With a few essential tools and supplies, you can get started right away.
The Benefits of Canning and Preserving Your Own Food: Why You Should Try It
Are you tired of constantly running to the grocery store to buy produce? Have you been considering canning and preserving your own food, but are still unsure if it’s worth the effort? Here are some benefits of canning and preserving your own food that might convince you to give it a try:
- Increased Nutritional Value: When you preserve your own food, you have control over the quality of ingredients you use. This means that you can choose to use organic produce and avoid harmful pesticides and additives, increasing the nutritional value of your food.
- Cost-Effective: Canning and preserving your own food is a great way to save money in the long run. You can purchase produce in bulk when it’s in season and cheaper, and then preserve it for use throughout the year.
- Environmental Benefits: By canning and preserving your own food, you can reduce your carbon footprint. You are not contributing to the transportation and production of store-bought products, which helps to reduce greenhouse gas emissions.
Canning and preserving your own food can also be a fun and rewarding experience. It allows you to get creative with your cooking, experiment with new flavors, and share your homemade goodies with friends and family. Plus, there’s a satisfaction that comes with knowing you made something from scratch that will nourish your body.
So, if you’re looking for a way to increase the nutritional value of your meals, save money, and reduce your environmental impact, canning and preserving your own food is definitely worth a try. Why not start with one of the delicious recipes we have provided for you?
Essential Tools and Supplies for Canning and Preserving: What You Need to Get Started

If you’re interested in canning and preserving food, you’ll want to make sure you have the right tools and supplies. While there are plenty of options out there, some are more essential than others. Here are the key items you’ll want to have on hand:
| Tool/Supply | Description |
|---|---|
| Canning Jars | Choose glass jars specifically designed for canning, with a two-piece sealing lid that includes both a flat metal lid and a screw-on band. |
| Canning Pot | A large, deep pot with a lid is necessary for processing your jars of food in a water bath. A canning pot should be tall enough to fully immerse your jars in boiling water by at least an inch. |
| Canning Rack | Some canning pots come with a rack to hold jars in place or to elevate them slightly off the bottom, but if yours doesn’t, you can purchase one separately. |
| Jar Lifter | Essential for safely removing hot jars from the canning pot, a jar lifter has rubber-coated grips that help prevent slipping. |
| Bubble Remover/Headspace Tool | This simple tool is a long, narrow plastic or wooden stick with a flattened end that you can use to remove air pockets from your jars of food and measure headspace accurately. |
| Funnel | A wide-mouthed funnel makes filling jars with hot liquid much easier and reduces spills. |
| Magnetic Lid Lifter | This handy tool allows you to easily lift sterilized lids out of hot water using a magnet, which reduces the risk of contamination while you’re processing your jars. |
| Spices, Vinegar, and other Ingredients | Many canning recipes require specific ingredients like vinegar, spices, or citric acid to ensure proper acidity for safe preservation. Make sure you have these on hand before you start any recipe. |
Of course, there are plenty of other tools and supplies that can make your canning and preserving experience easier or more fun. For example, some people like to use a decorative label maker to create pretty jar labels, or silicone canning jar sleeves to help protect your jars from breaking. However, the items listed above are truly essential for your safety and success in the canning process.
Once you have your tools and supplies, you’ll be ready to dive into the world of canning and preserving. It’s a fun and rewarding way to enjoy the flavors of summer all year long!
Recipes
Homemade Strawberry Jam
If you’re looking for a fun, easy, and delicious way to preserve some of the fresh produce from your garden or local farmers’ market, why not try making your own homemade strawberry jam? Not only is it a great way to enjoy the flavors of summer all year round, but it also makes a thoughtful and personalized gift for friends and family.
To make strawberry jam, you’ll need a few basic tools and supplies. First and foremost, you’ll need a large pot or Dutch oven for cooking the jam and sterilizing the canning jars. You’ll also need a ladle, funnel, and canning tongs for filling and removing the jars from the boiling water bath. And of course, you’ll need plenty of fresh strawberries, pectin, sugar, and lemon juice for the jam itself.
| Ingredients: | Instructions: |
|---|---|
| 2 pounds fresh strawberries, hulled and mashed | In a large pot or Dutch oven, combine the mashed strawberries, pectin, sugar, and lemon juice. Bring the mixture to a boil over high heat, stirring constantly. |
| 1 package powdered pectin (1.75 oz) | Reduce the heat to medium and continue to cook, stirring occasionally, for 10-15 minutes or until the jam has thickened and passed the ‘wrinkle test’. |
| 5 cups granulated sugar | Remove the pot from the heat and skim off any foam from the surface of the jam, if necessary. |
| 3 tablespoons lemon juice | Using a ladle and funnel, fill the sterilized canning jars with the hot jam, leaving 1/4 inch of headspace. |
Once your jars are filled, wipe any excess jam from the rims of the jars, place the lids on top, and tighten the bands until they’re just fingertip tight. Then, carefully lower the jars into the boiling water bath and process for 10 minutes. After processing, remove the jars from the water bath and let them cool to room temperature. As the jars cool, you should hear a ‘ping’ sound as the seals tighten, indicating that the jars are properly sealed.
Once your jars of homemade strawberry jam are cooled and sealed, you can store them in a cool, dry, and dark place for up to a year. Use them on toast, biscuits, or scones, or incorporate them into your favorite baking recipes for a touch of sweetness and flavor.
So why not try making your own homemade strawberry jam today? You’ll love the taste, and the sense of accomplishment and creativity that comes from preserving your own food.
Pickled Cucumbers
If you are a fan of pickles, then you’ll definitely want to try making your own pickled cucumbers. Not only is it a fun and rewarding activity, but you’ll also get to enjoy the delicious taste and health benefits of homemade pickles. So, let’s dive in and learn how to create this simple and easy recipe!
The first thing you’ll need is some fresh cucumbers. Be sure to choose ones that are firm and have a bright green color. You’ll also need some spices and seasonings to flavor your pickles. We recommend using garlic, dill, and mustard seeds for a classic taste, but you can also experiment with other herbs and spices.
| Ingredients | Amount |
|---|---|
| Cucumbers | 2 lbs |
| Vinegar (white or apple cider) | 2 cups |
| Water | 2 cups |
| Sugar | 1/4 cup |
| Garlic cloves | 3-4 |
| Dill seeds | 2 tbsp |
| Mustard seeds | 1 tbsp |
| Salt | 2 tbsp |
Once you have your ingredients, it’s time to start preparing your pickles. Begin by washing your cucumbers and slicing them into spears, rounds, or chips. Then, pack them tightly into clean jars, leaving some space at the top.
Next, you’ll need to make your pickling solution. In a saucepan, combine the vinegar, water, sugar, garlic, dill seeds, mustard seeds, and salt. Heat the mixture over medium-high heat, stirring occasionally, until the sugar and salt have dissolved.
Pour the hot pickling solution over the cucumbers in the jars, making sure to cover them completely. Then, seal the jars tightly with their lids and refrigerate them for at least 24 hours before enjoying your homemade pickles.
Now that you know how to make your own pickled cucumbers, you’ll never have to rely on store-bought pickles again. Plus, you’ll get to enjoy the health benefits of homemade food. So, go ahead and embrace the art of canning and preserving your own food!
Classic Tomato Sauce
Tomatoes are one of the most versatile and beloved fruits in the world. They come in a variety of colors and flavors, and can be used in everything from salads to sauces. If you’re looking for a way to make use of all those fresh tomatoes from your garden or the farmer’s market, look no further than classic tomato sauce!
To make this basic tomato sauce, you’ll need a variety of ingredients including fresh tomatoes, garlic, olive oil, onions, and a variety of herbs and spices. Diced tomatoes are simmered with olive oil, garlic, and onions until they break down and become a rich, flavorful sauce. Once the sauce has cooked down to the desired consistency, it can be used immediately or canned for future use.
- 8 pounds fresh tomatoes, diced
- 1/4 cup olive oil
- 1 large onion, diced
- 4 cloves garlic, minced
- 2 teaspoons salt
- 2 teaspoons dried basil
- 1 teaspoon dried oregano
- 1/2 teaspoon dried thyme
- 1/2 teaspoon freshly ground black pepper
| Ingredients | Directions |
|---|---|
| Diced tomatoes | In a large pot or Dutch oven, heat the olive oil over medium heat. Add the onion and garlic, and sauté until the onion is translucent, about 5 minutes. Add the diced tomatoes, salt, basil, oregano, thyme, and black pepper, and bring the mixture to a simmer. |
| Olive oil, onion, garlic, salt, basil, oregano, thyme, black pepper | Reduce the heat to low and let the sauce simmer for 2-3 hours, stirring occasionally, until the tomatoes have broken down and the sauce is thick and flavorful. Taste and adjust seasoning as necessary. |
| Sauce | Use the tomato sauce immediately, or let it cool and store it in jars in the refrigerator or freezer. |
Classic tomato sauce is a versatile staple that can be used in hundreds of different dishes. Use it as a base for homemade pizza, stir it into your favorite pasta dishes, or serve it alongside grilled meats and veggies. Once you master the recipe, you can experiment with adding additional ingredients like red pepper flakes, olives, or capers to customize the flavor to your liking.
So go ahead and enjoy the fruits of your labor by making this delicious classic tomato sauce. You’ll love the flavor and versatility of this easy sauce, and you’ll never want to go back to store-bought again!
Spicy Pepper Jelly
Have you ever tried to make your own jelly? If not, it’s time to give it a shot! This recipe for spicy pepper jelly will have your taste buds tingling with delight. Whether you’re looking for something to pair with your favorite cracker or to spread on your morning toast, this jelly will make the perfect addition to your pantry.
| Ingredients: | Instructions: |
|---|---|
|
|
This jelly is versatile and can be used in a number of ways. Try spreading it on toast with cream cheese for a sweet and spicy breakfast or serve it alongside your favorite cheese plate for a unique twist on a classic appetizer. The possibilities are endless!
Sweet Peach Chutney
Sweet Peach Chutney is a versatile and flavorful condiment that can be paired with a variety of dishes. Whether you’re looking to add some sweetness to your cheese board, or you want to spice up your chicken or pork dishes, Sweet Peach Chutney is a great option.
Making your own Sweet Peach Chutney at home is easy with just a few basic ingredients that you can find in any grocery store. The key is to find the ripest peaches you can, as this will ensure a sweet and juicy chutney.
- 6 ripe peaches, peeled and chopped
- 1/2 cup white vinegar
- 1/2 cup brown sugar
- 1/2 cup raisins
- 1/2 cup diced onion
- 1/4 cup chopped crystalized ginger
- 1/4 cup mustard seeds
- 1/4 tsp cayenne pepper
Combine all ingredients in a large saucepan and bring to a boil over medium-high heat. Reduce the heat and let simmer for about 30 minutes, stirring occasionally, until the mixture thickens and the peaches have broken down.
Once the chutney has thickened, remove from the heat and let cool. Transfer the chutney to jars and store in the refrigerator for up to a month. You can also process the jars in a water bath canner for longer storage.
Sweet Peach Chutney is a delicious and unique condiment that is sure to impress your guests. Whether you’re serving it with cheese, pork, or chicken, the sweet and spicy flavors will complement any dish.
Canned Applesauce
Canning and preserving your own food is a great way to save money, reduce waste, and create delicious homemade meals all year round. One of the easiest and most versatile recipes to try is canned applesauce.
Start by gathering your equipment and ingredients. You’ll need a water bath canner or pressure canner, canning jars and lids, a sharp knife or apple peeler, and fresh apples. Choose a variety that’s good for cooking, like Rome, Jonathan, or Granny Smith.
| Ingredients: | Quantity: |
|---|---|
| Fresh apples | 10 lbs |
| Water | 1 cup |
| Lemon juice | 1/2 cup |
| Cinnamon (optional) | 1 tsp |
| Sugar (optional) | 1/2 cup |
Peel and core the apples, then chop them into small chunks. In a large pot or Dutch oven, cook the apples with the water over medium heat until they’re soft and mushy. Puree the apples with a hand-held immersion blender or food processor until they’re smooth. If desired, add cinnamon and sugar to taste.
Next, you’ll need to can the applesauce to make it shelf-stable. Sterilize your canning jars and lids in boiling water, and keep them hot until you’re ready to use them. Fill each jar with hot applesauce, leaving 1/2 inch of headspace at the top. Wipe the rims clean, then place the lids and rings on the jars. Process the jars in a boiling water bath or pressure canner for the recommended time, based on your altitude and canning method.
Once the jars are finished processing, let them cool at room temperature for 12 to 24 hours. Check the seals before storing the jars in a cool, dark place. Canned applesauce can last for up to 1 year.
Enjoy your homemade canned applesauce as a snack, side dish, or dessert. It’s great paired with pork chops or as a topping for oatmeal or pancakes. You can also use it in baking recipes, like muffins or apple crisp.
Dill Pickles
One of the most beloved preserved foods is pickles. Not only are they a delicious snack on their own but they are also a great addition to sandwiches and salads. Making your own dill pickles is easier than you might think and can be accomplished with just a few simple ingredients.
The first step is to gather your supplies. You will need fresh cucumbers, dill, garlic cloves, vinegar, pickling salt, and water. You will also need jars and lids to store your pickles in once they are finished.
- 3-4 pounds of fresh cucumbers
- 2-3 sprigs of fresh dill
- 2-3 garlic cloves, peeled
- 1 cup of vinegar
- 1/4 cup of pickling salt
- 6 cups of water
Begin by washing and drying your cucumbers. Cut off the blossom end of each cucumber as it contains enzymes that can cause the pickles to become soft. In each jar, place one sprig of dill and one garlic clove. Next, pack in your cucumbers tightly, leaving about 1/2 inch of headspace.
In a saucepan, combine vinegar, pickling salt, and water. Bring the mixture to a boil and then remove from heat. Pour this brine over the cucumbers in the jars and make sure they are completely covered.
Place the lids on the jars and then process them in a boiling water bath for about 10 minutes. After the time is up, remove the jars from the water and let them cool to room temperature. Once cooled, store them in a cool, dry place for at least a week before enjoying.
These dill pickles will last for up to a year and make a great addition to any party or meal. Homemade dill pickles are a tasty and easy way to preserve one of summer’s best vegetables.
Blueberry Preserves
Blueberries. They’re a delicious and healthy treat that many of us love to snack on. But did you know that you can also turn them into a delicious jam that you can enjoy all year round? Blueberry preserves are a great way to make the most of this wonderful fruit, and they’re surprisingly easy to make.
To start, you’ll need a few simple ingredients: fresh blueberries, sugar, lemon juice, and pectin. Pectin is a natural thickening agent that helps the preserves set properly, so make sure to include it in your recipe.
- 2 pounds of blueberries
- 4 cups of sugar
- 1/4 cup of fresh lemon juice
- 1 pouch of liquid pectin
Begin by washing the blueberries and removing any stems or leaves that might still be attached. Once they’re clean, crush them using a potato masher or a fork. You don’t need to mash them completely – just enough to break them down a bit and release some of their juices.
Next, combine the crushed blueberries, sugar, and lemon juice in a large pot. Stir everything together well, then bring the mixture to a boil over medium-high heat. Once it’s boiling, add the pouch of pectin and stir everything together for another minute or so.
Reduce the heat to low and let the mixture simmer for about 10-15 minutes, stirring occasionally. You’ll know the preserves are ready when they’ve thickened up and are starting to cling to the sides of the pot.
Finally, remove the pot from the heat and ladle the hot preserves into clean, sterilized jars. Seal up the jars tightly and let them cool to room temperature. Once they’re cool, you can store them in the refrigerator for a few weeks or in the freezer for several months.
Now that you’ve made your own blueberry preserves, you can enjoy them on toast, muffins, or even as a topping on ice cream. They’re a great way to enjoy the taste of fresh blueberries all year round, and they make a wonderful homemade gift for friends and family.
Conclusion
As our blog series on canning and preserving your own food comes to an end, we hope that you’ve found it informative and inspiring. From learning about the benefits of canning and preserving your own food, to trying out delicious recipes like homemade strawberry jam and tangy pickled beets, we’ve covered a lot of ground.
Before we wrap up, let’s take a moment to reflect on the joy and satisfaction that comes with embracing the art of canning and preserving. Not only does it allow us to enjoy fresh, nutritious food year-round, but it also connects us to our grandparents’ and great-grandparents’ generation who practiced these skills out of necessity. As we continue to face challenges related to food security and sustainability, it’s important to keep these traditions alive.
| Benefits of Canning and Preserving: | Tools and Supplies: | Recipes: |
|---|---|---|
|
|
|
We encourage you to continue exploring the world of canning and preserving, trying new recipes and experimenting with different techniques. Don’t be afraid to make mistakes – after all, that’s how we learn! And if you ever need guidance or inspiration, there are plenty of online resources and community groups to turn to.
Thank you for taking the time to read our blog series. We hope you’ve gained a newfound appreciation for the art of canning and preserving, and that you’ll join us in carrying on this meaningful tradition for generations to come.